
Space is at a premium in an RV, and nowhere is that either more evident or more important than in the kitchen area. Usually, if you’re lucky and you have a larger RV, they will put both a sink and an oven/stove combo in the kitchen, and then that’s about all you have room for. Your entire kitchen counter space is now taken up with those two surfaces.
The most common solution to this problem is to just build covers, so that when you’re not actively using either the sink or the stove, there is a solid surface over one or the other (or both) that functions as a counter top for cutting and preparing food. Then you just have to juggle using these surfaces at the same time as either the sink or the stove, but that’s another challenge.
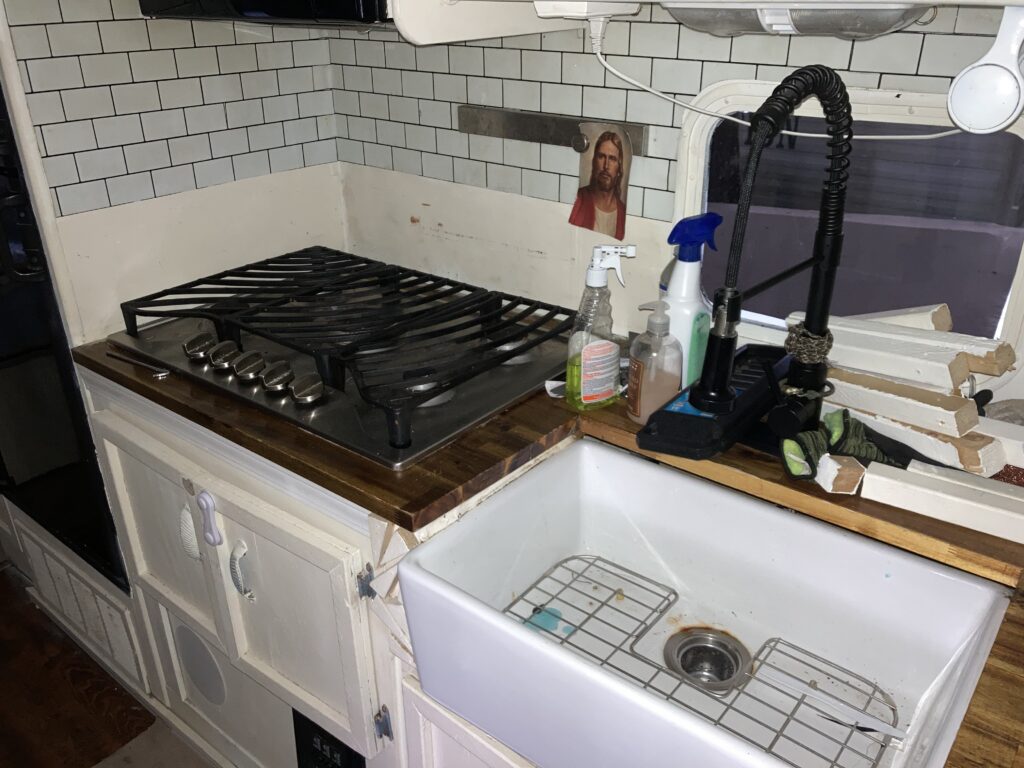
The Transit came with a sink cover made from the chunk of butcher block that they cut out to install the sink in the first place. That’s super convenient for me. I’ll discuss the sink in another post. But what to do with the stove?
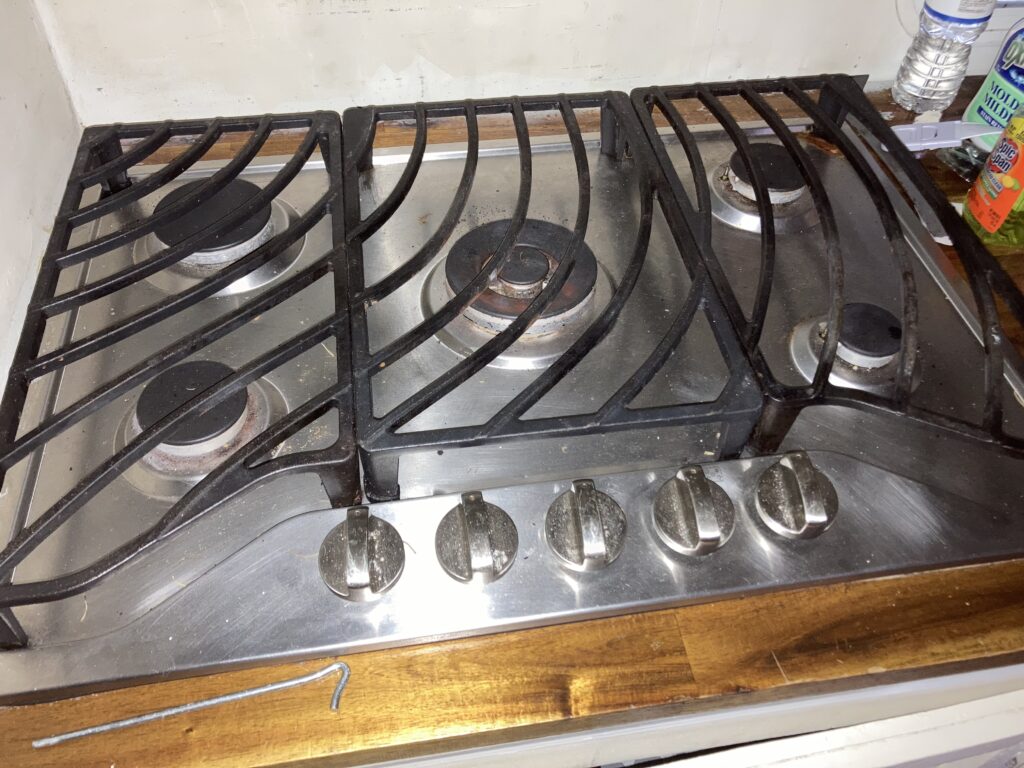
The stove is this very nice gas range with iron grates that sit on top for the pots. I’m pretty sure it’s fairly new. I’m used to electric ranges with low profiles, and a lot of RVers moved to those induction ranges that are nice and flat and don’t heat up unless you put the fancy induction pots on them. That seems like a very safe option that gives the best of both worlds.
But in my case, I have this rather bulky range. The grates are sturdy enough to hold things like mixing bowls or cutting boards, but the gas burner caps are exposed and crumbs and debris fall right down onto the burners. Plus, those knobs are exactly the right height to be pressed down on when I lean across the counter to reach the cupboard above it. This is a bad thing because pushing the knob in is what ignites the burners.
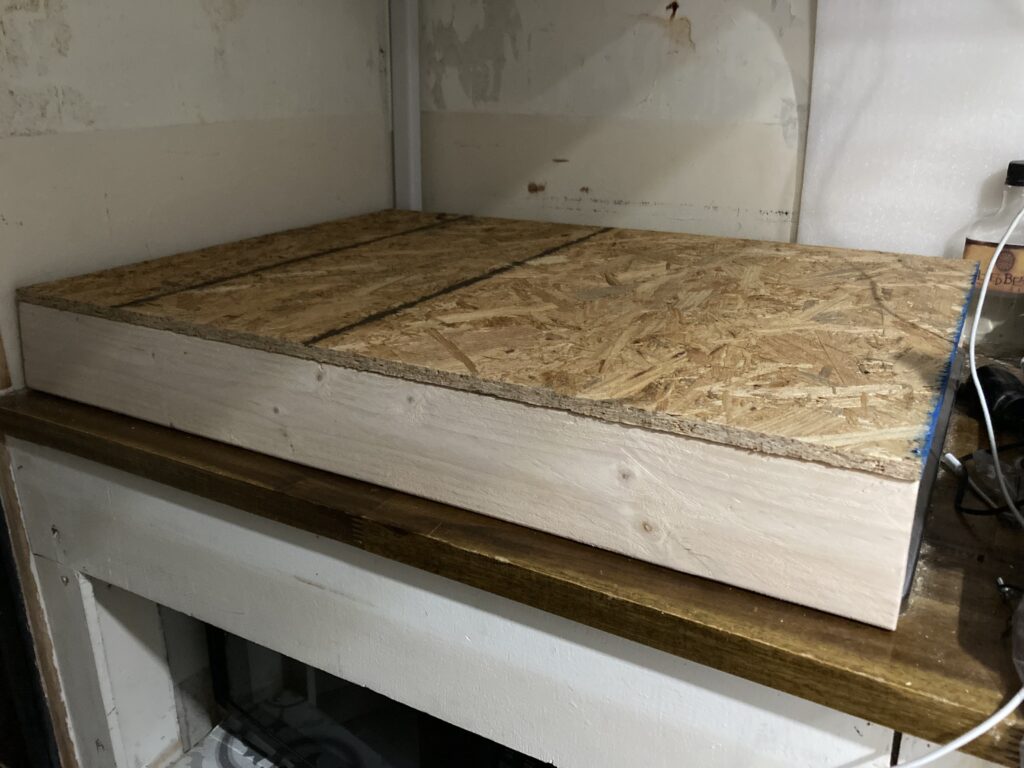
Back in July, 2021, I made what I called “cutting boards” for The Void (my current RV that I’m still living in while I remodel The Transit) – 2 pieces of plywood that lay upon the 2 front burners and the 2 back burners respectively of my electric stove top. Later, I removed the oven and stove, and these cutting boards became the new counter top. I was quite proud of these boards and I wanted to do something similar for this range.
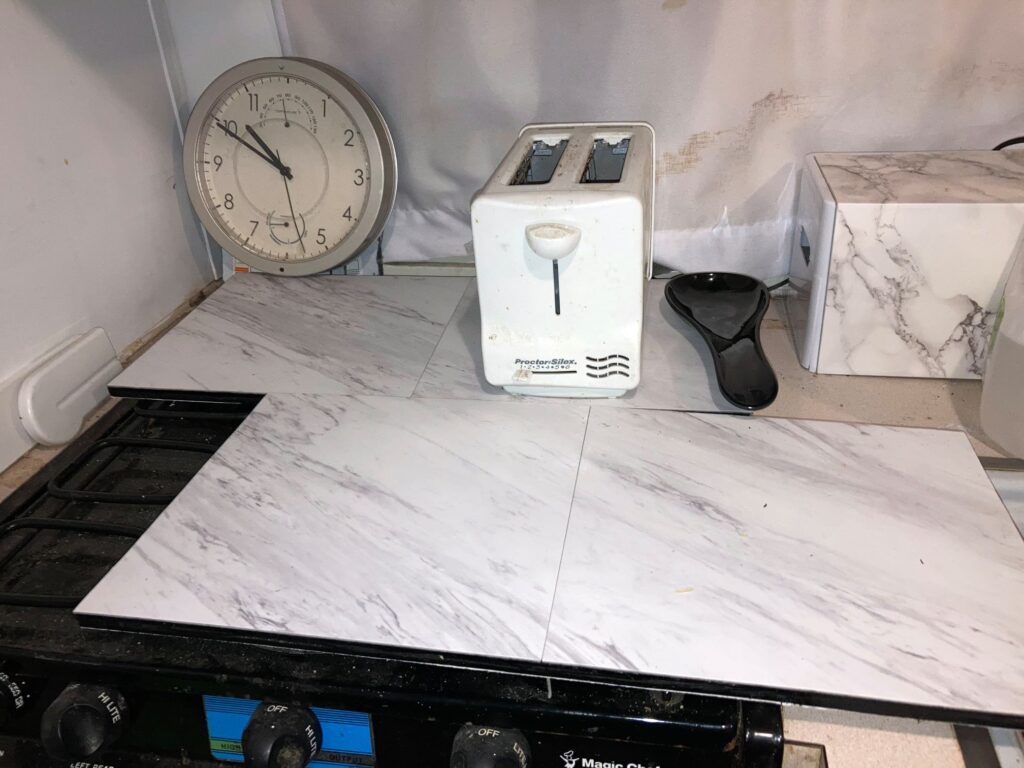
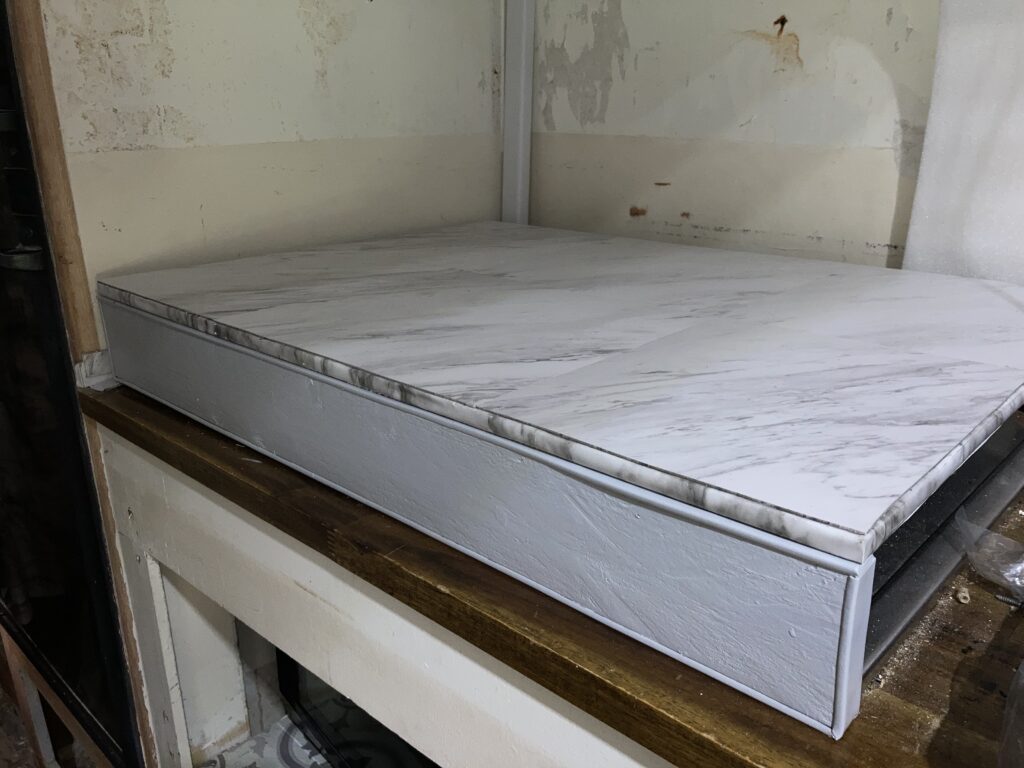
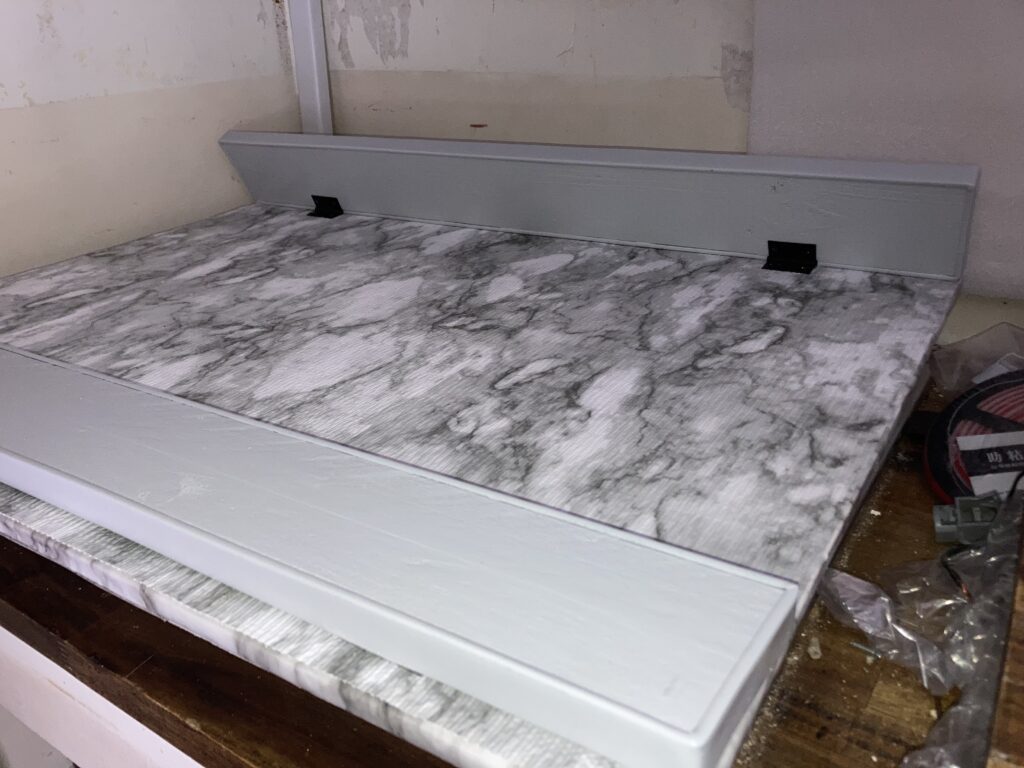
Here you can see that it’s literally just a piece of plywood with the edges painted black, vinyl floor tile on the top surface, and a marble patterned rubber shelf liner on the bottom to keep the boards from sliding and to protect the hobs from being scratched up.
I’ve been living in The Void for 4 years with these cutting boards as my counter tops and I continue to be pleased with them. But what to do with the giant gas range in The Transit? I could do the same thing and just cut some plywood to fit on top, but as you can see in the first image, those grates are quite tall. and I still have that knob problem with igniting the strikers. That was not a problem with my electric range in The Void.
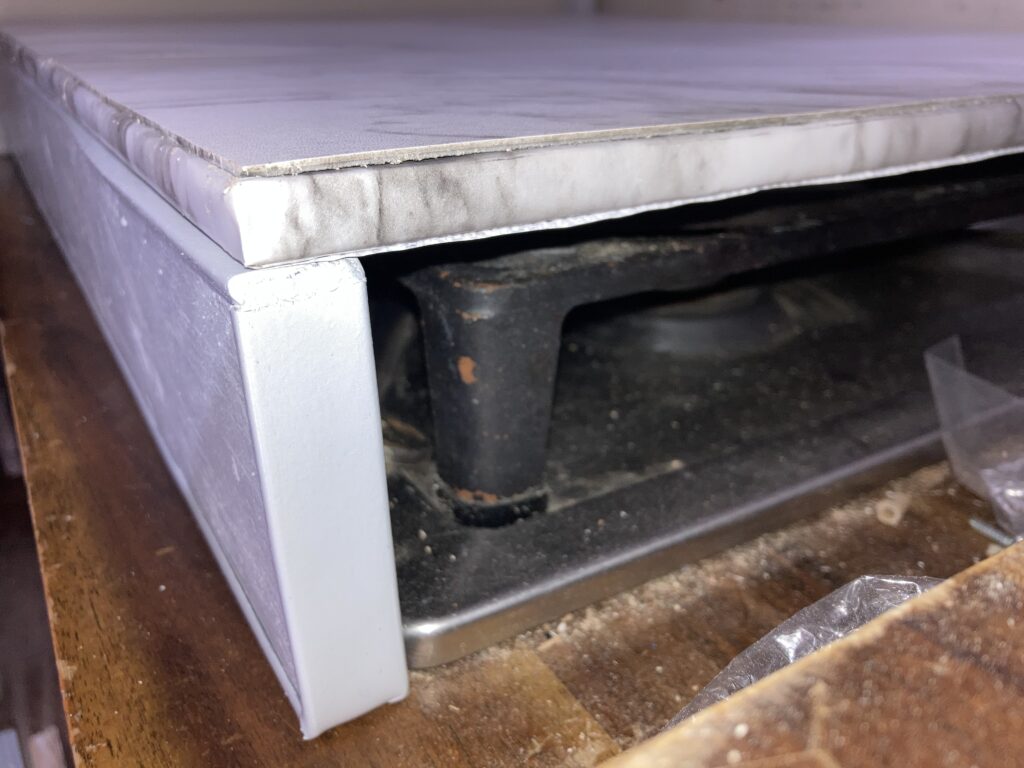
Rather than just a board to sit on top, this time I decided to build a platform. I chose to cut a 2×4 the full width of the board and install them on the front and back sides of the board to function as legs. These completely cover the stove knobs and prevent any accidental ignition.
Next I glued the marble rubber shelf liner to the underside, same as the original in The Void. The legs keep the platform off the grates but only barely, and I just felt safer having the underside covered with a nice, soft, rubber liner. Instead of painting the edges black, like I did with the original “cutting boards”, I chose to cover the edges in an adhesive marble shelf liner paper, like I did for the counter tops and tables in The Void.
This involved cutting strips about 2 inches or so wider than the thickness of the board, putting the strip along the edge and folding the excess over on both top and bottom, and then covering those edges with the rubber liner or the vinyl tiles that I used to surface the board.
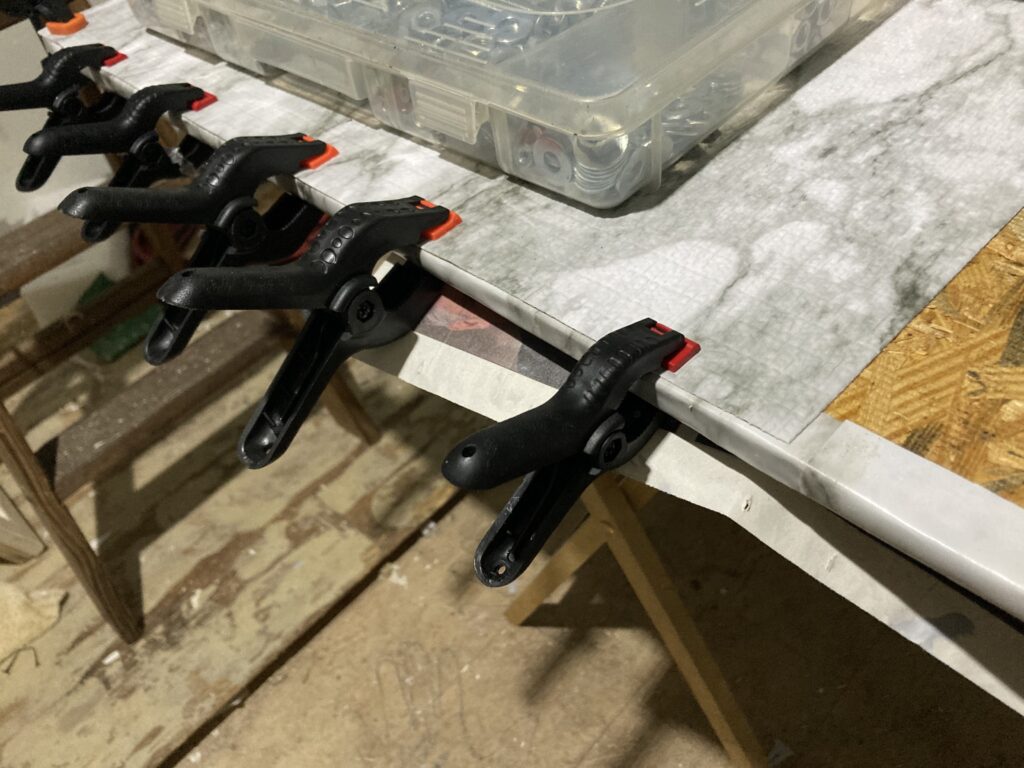
Once the sides were covered and the rubber liner was glued on, I attached the vinyl floor tiles to the top.

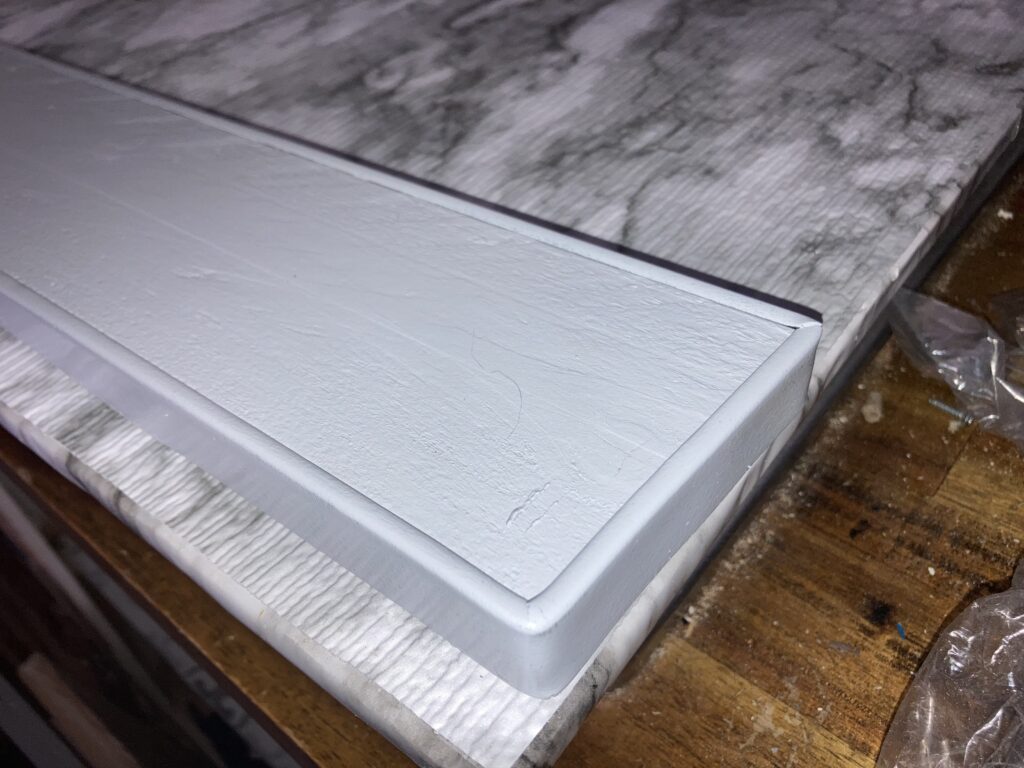
I really like the look and feel of these tiles as a counter top. It’s a nice, smooth surface for cutting and meal prep, it’s really easy to wipe clean, but it’s not a super slick glossy surface like a marble so things don’t tend to slide around on it even though it’s smooth.
Finally, the legs. First, I decided to paint the legs the same grey as the rest of the cupboards and trim. I attached them to the platform, but it still looked unfinished to me. I spend a lot of time just window shopping online for building materials and storage options and household stuff, so the algorithms have started showing me related items, some of which look really useful or give me ideas.
One of them was this 3/4″ rubber trim. In The Void, I had noticed that cabinet edges were sort of finished off with this plastic edging, but I could not find anything like that anywhere in consumer-based home stores. So when I took out some cabinets and rebuilt things myself, they didn’t have the same finished look.
But then this trim crossed my feed. I wasn’t sure what I would use it for, but I put it in my shopping cart, just in case. Then, as I prepped the cabinets for painting, the same kind of plastic edging as in The Void came off when I started stripping paint! I wasn’t sure what I was going to do to finish off that raw edge until this rubber trim showed up. I’ll detail that in another post.
But I had some left over and I was so pleased with it in the other project that I really wanted to find another use for it. While I puzzled over how to finish off this stove cover, I happened to glance up at the leftover trim. Voila! A solution!
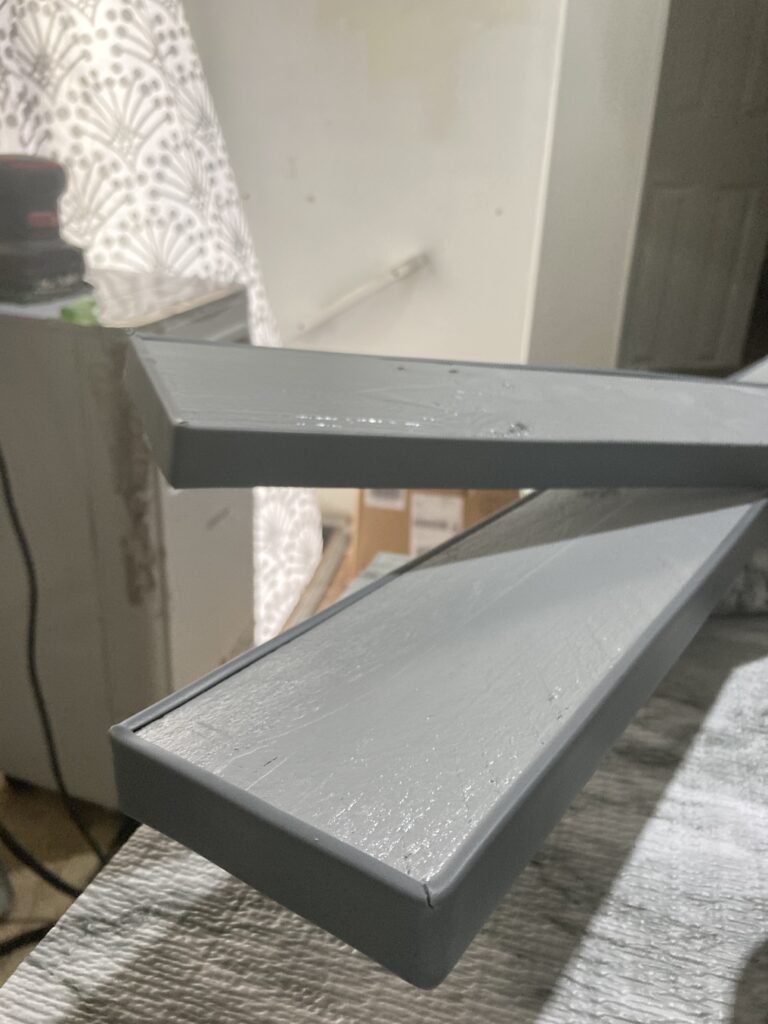
I adhered the trim all the way around, clipping the edges to make a clean corner. Then I painted it to match, although I’m not unhappy with the original color and I wouldn’t mind this being a contrast if the painting didn’t work. Fortunately, the paint did work.
Next was to attach the legs to the platform. However, I have nowhere to put this rather large piece when I want to use the stove. There is a small gap between the edge of the counter and the slide-out next to it that might be convenient to store, but this big box doesn’t fit down in that gap. It’ll be fine leaning against the counter if the slide is out, but I can’t get it down there when the slide is in.
My solution to this was to hinge the legs so that they fold flat underneath the surface.
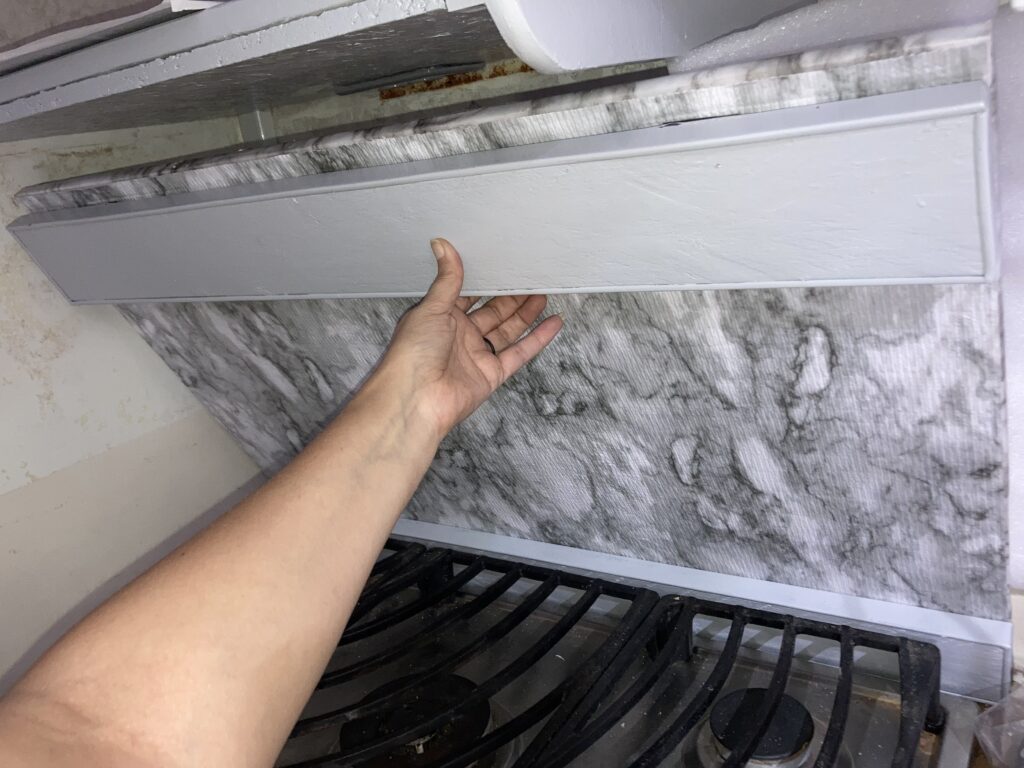
With the legs down, the box fits snugly around the frame of the stove so it doesn’t move anywhere, and the platform hovers just a small amount over the grate so that it takes the bulk of the weight of whatever I put on it. But it could rest on the grate and it won’t scratch it up.
So far I’m really happy with it. I suppose the test will be when I finally start cooking in here, but that won’t be for quite a while. Now, I have a pretty marble-covered box that protects my stove and provides a work surface where I had none, and I can fold the legs down and put it on the floor next to the sink, out of my way when I want to access the stove. I can’t wait to see what it looks like when I get the backsplash up!